This weekend I applied the labels for my panel. I got them from Drytransfersletters.com. They turned out perfectly and we’re super easy to apply.
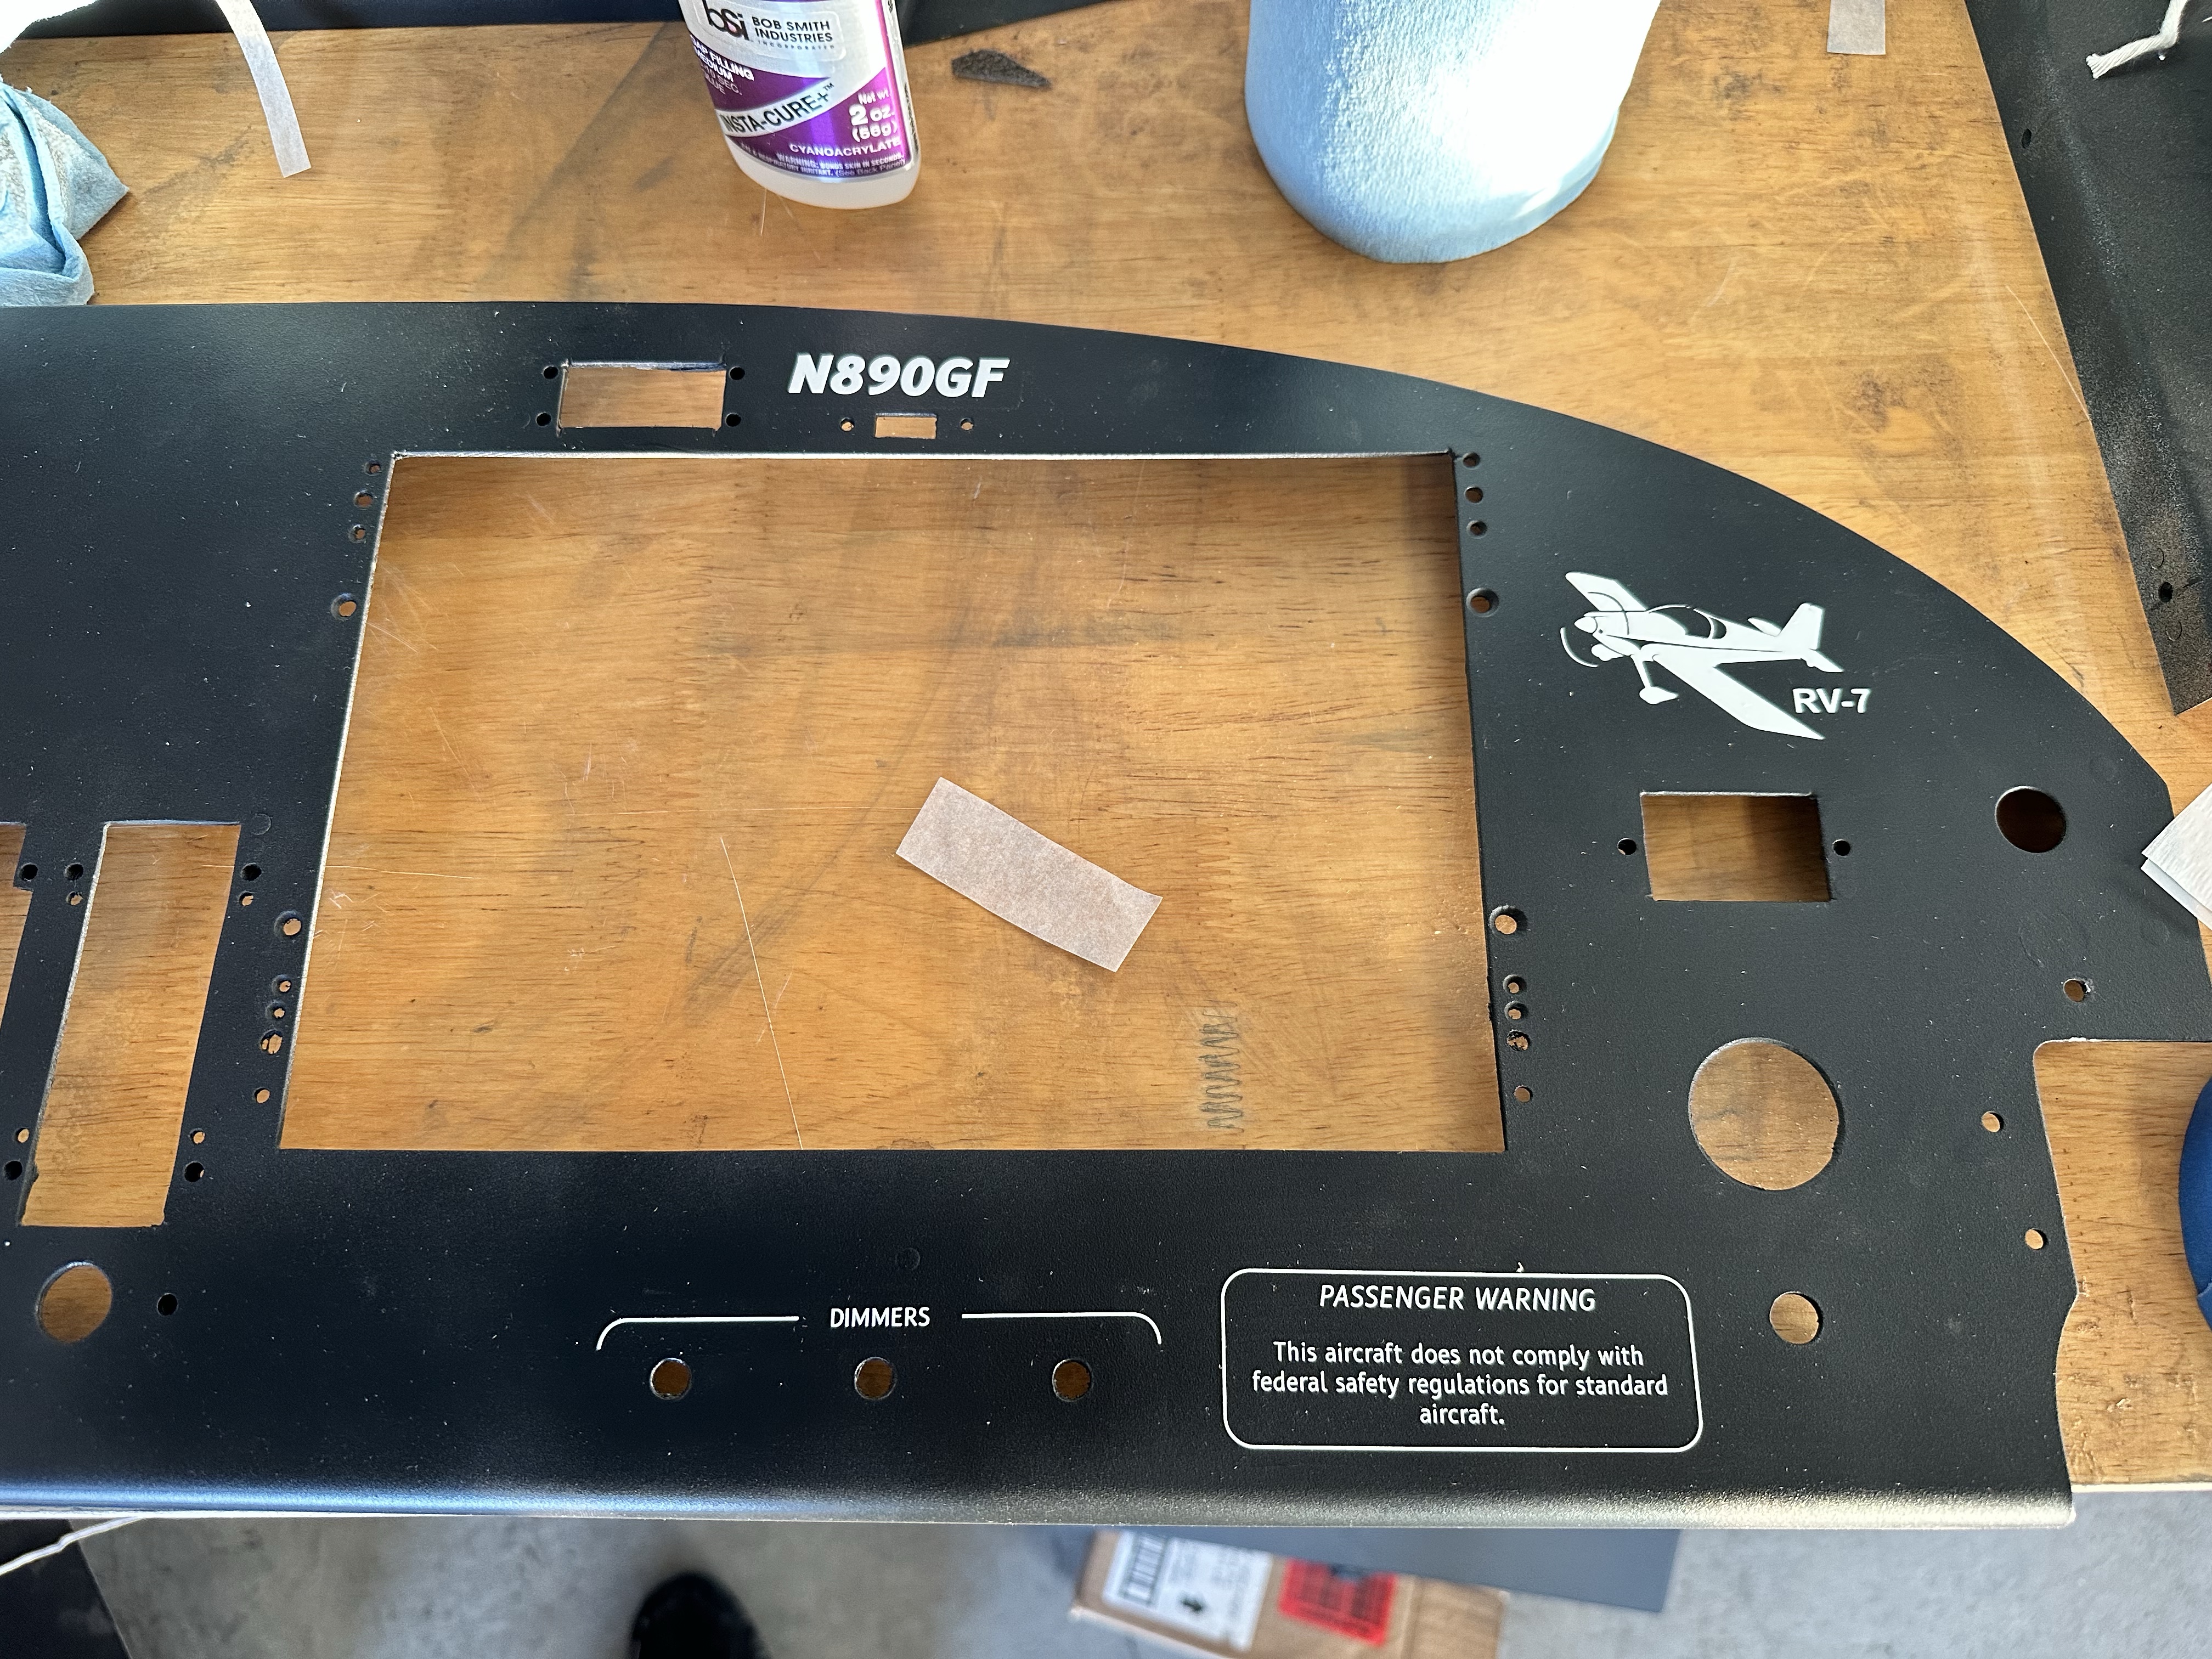
Here is the passenger side as I was applying them.

After applying all the labels I then applied a clear coat on top to seal everything.
While I was letting the coats dry, I spent some time doing the final masking and prep for the canopy.
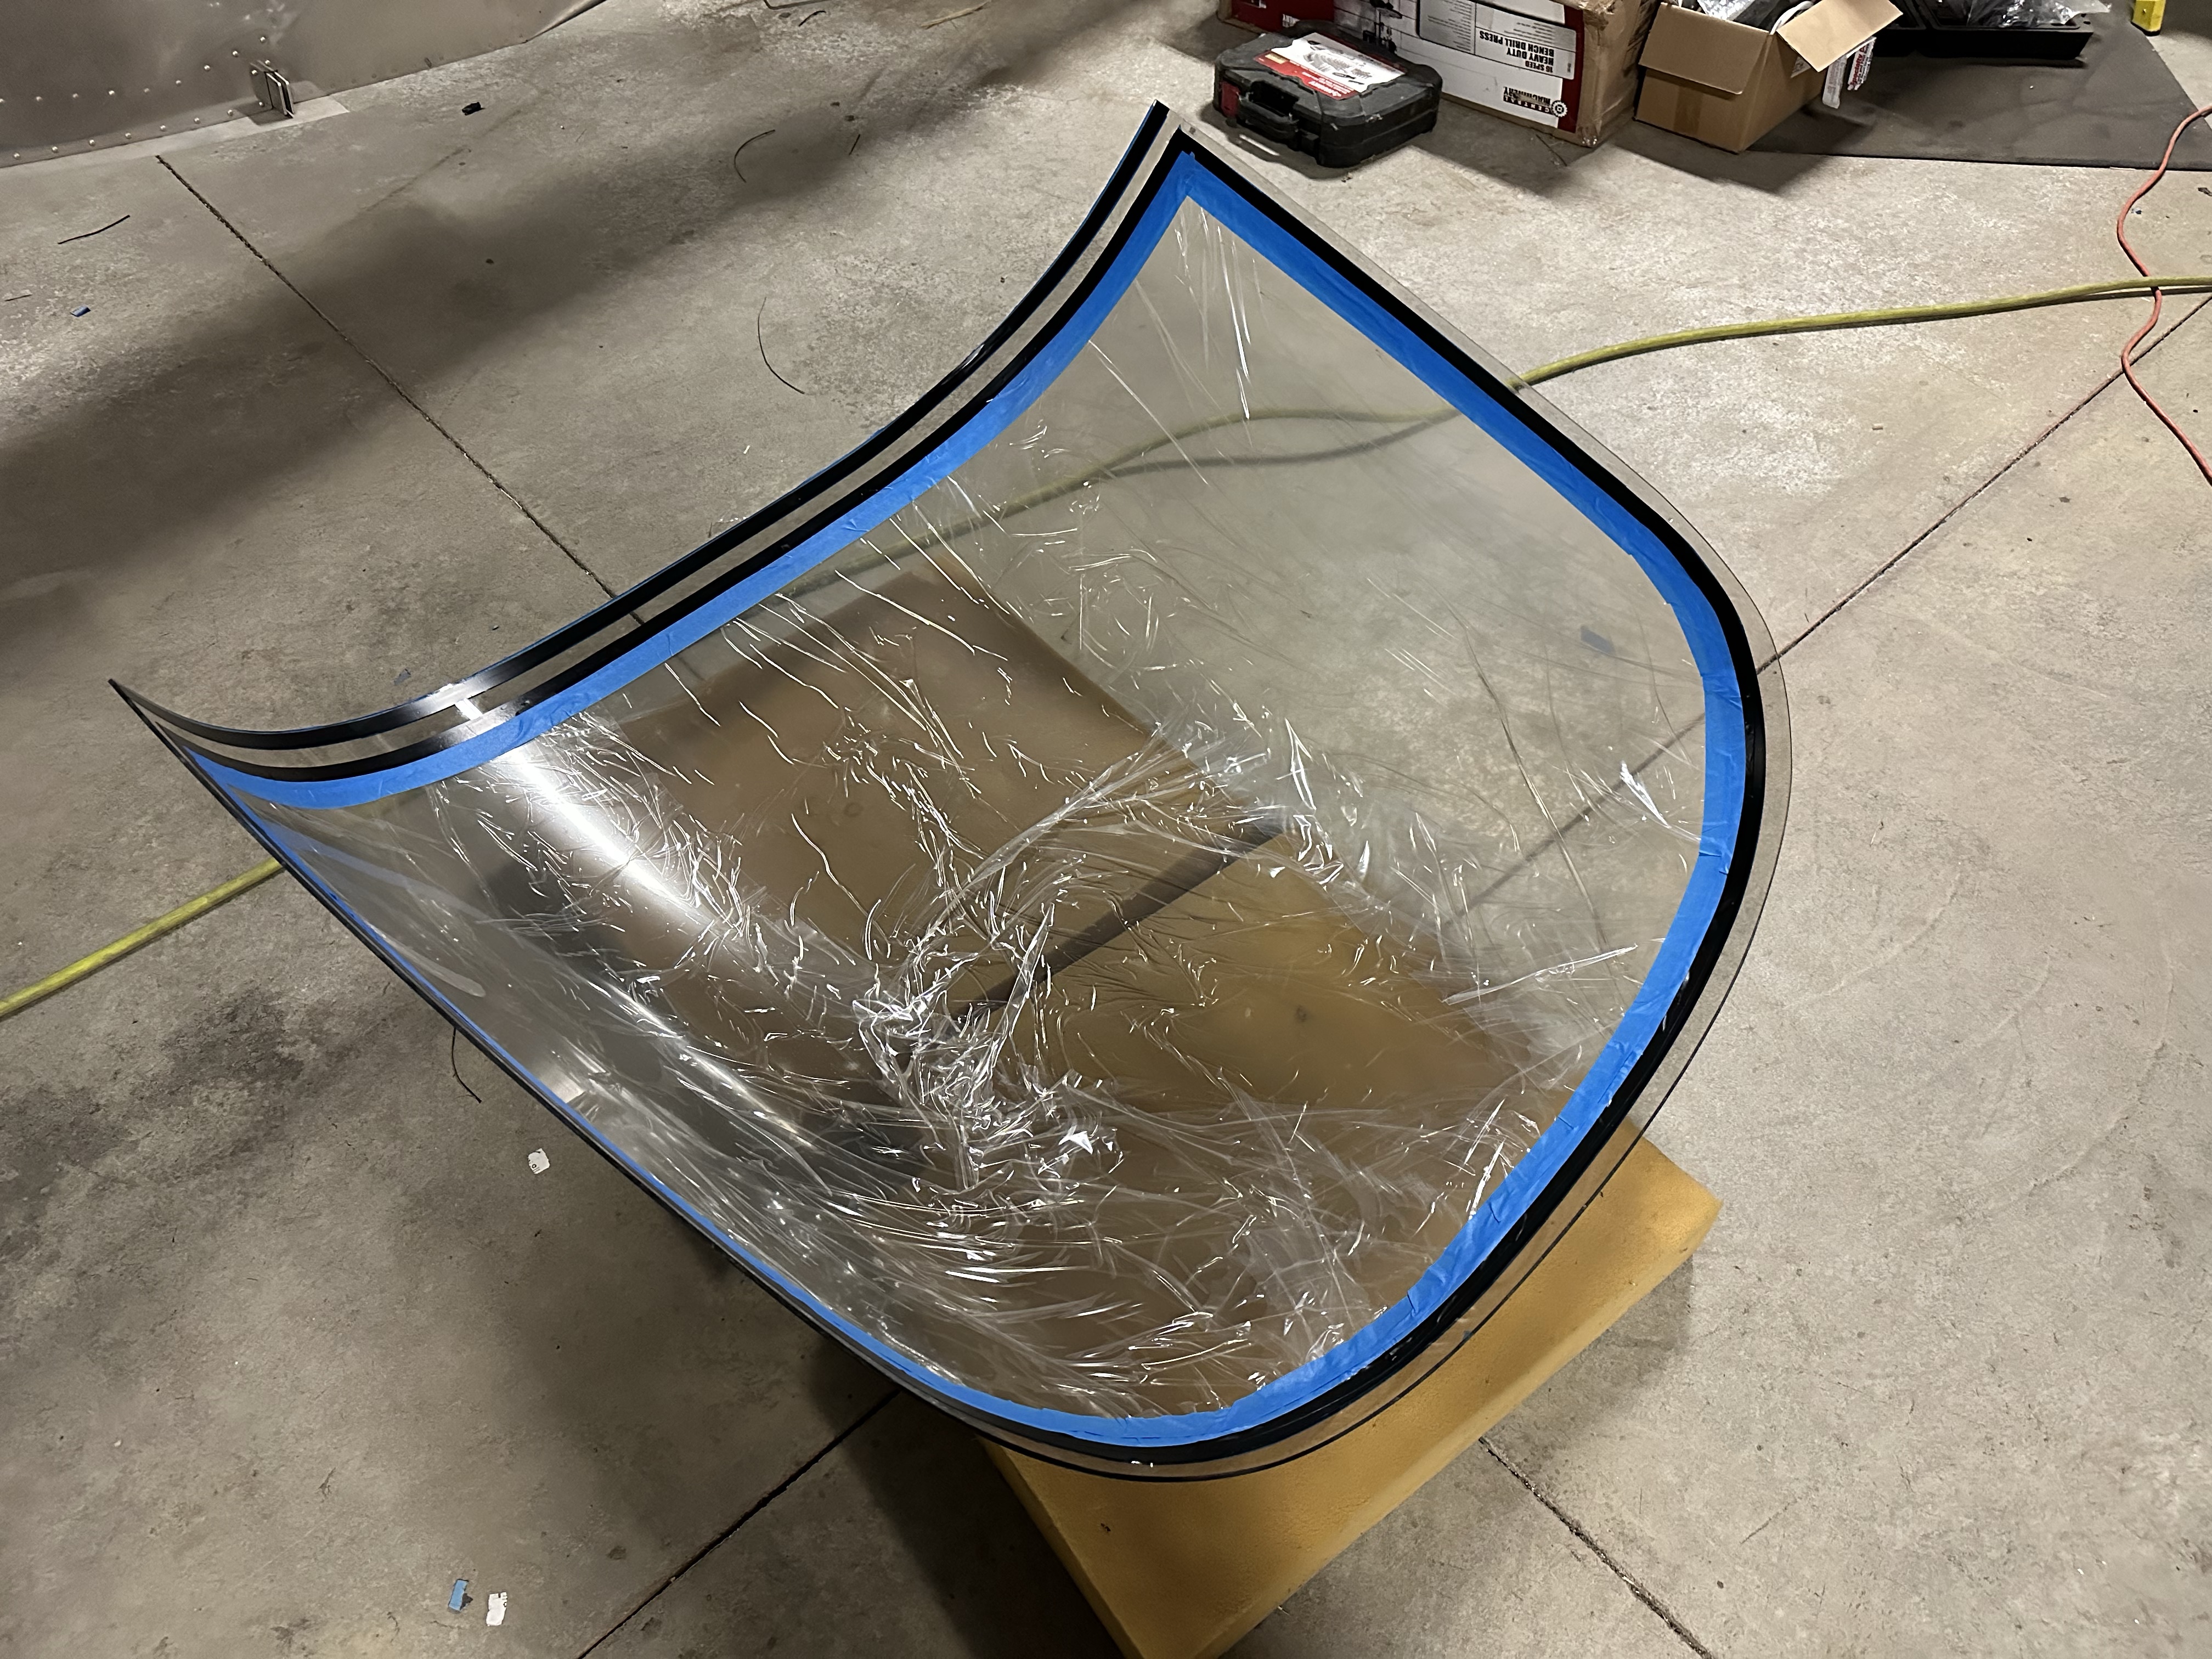
It’s now fully masked and ready for bonding. I’ll scuff the canopy prior to applying the adhesive primer.
I came back a couple days later to install the panel in the plane for hopefully the last time. I don’t think I’ll need to take it fully out again.

I installed the switch guards and switches first to make sure I had everything perfectly vertical and tightened fully. Then I installed the screens.
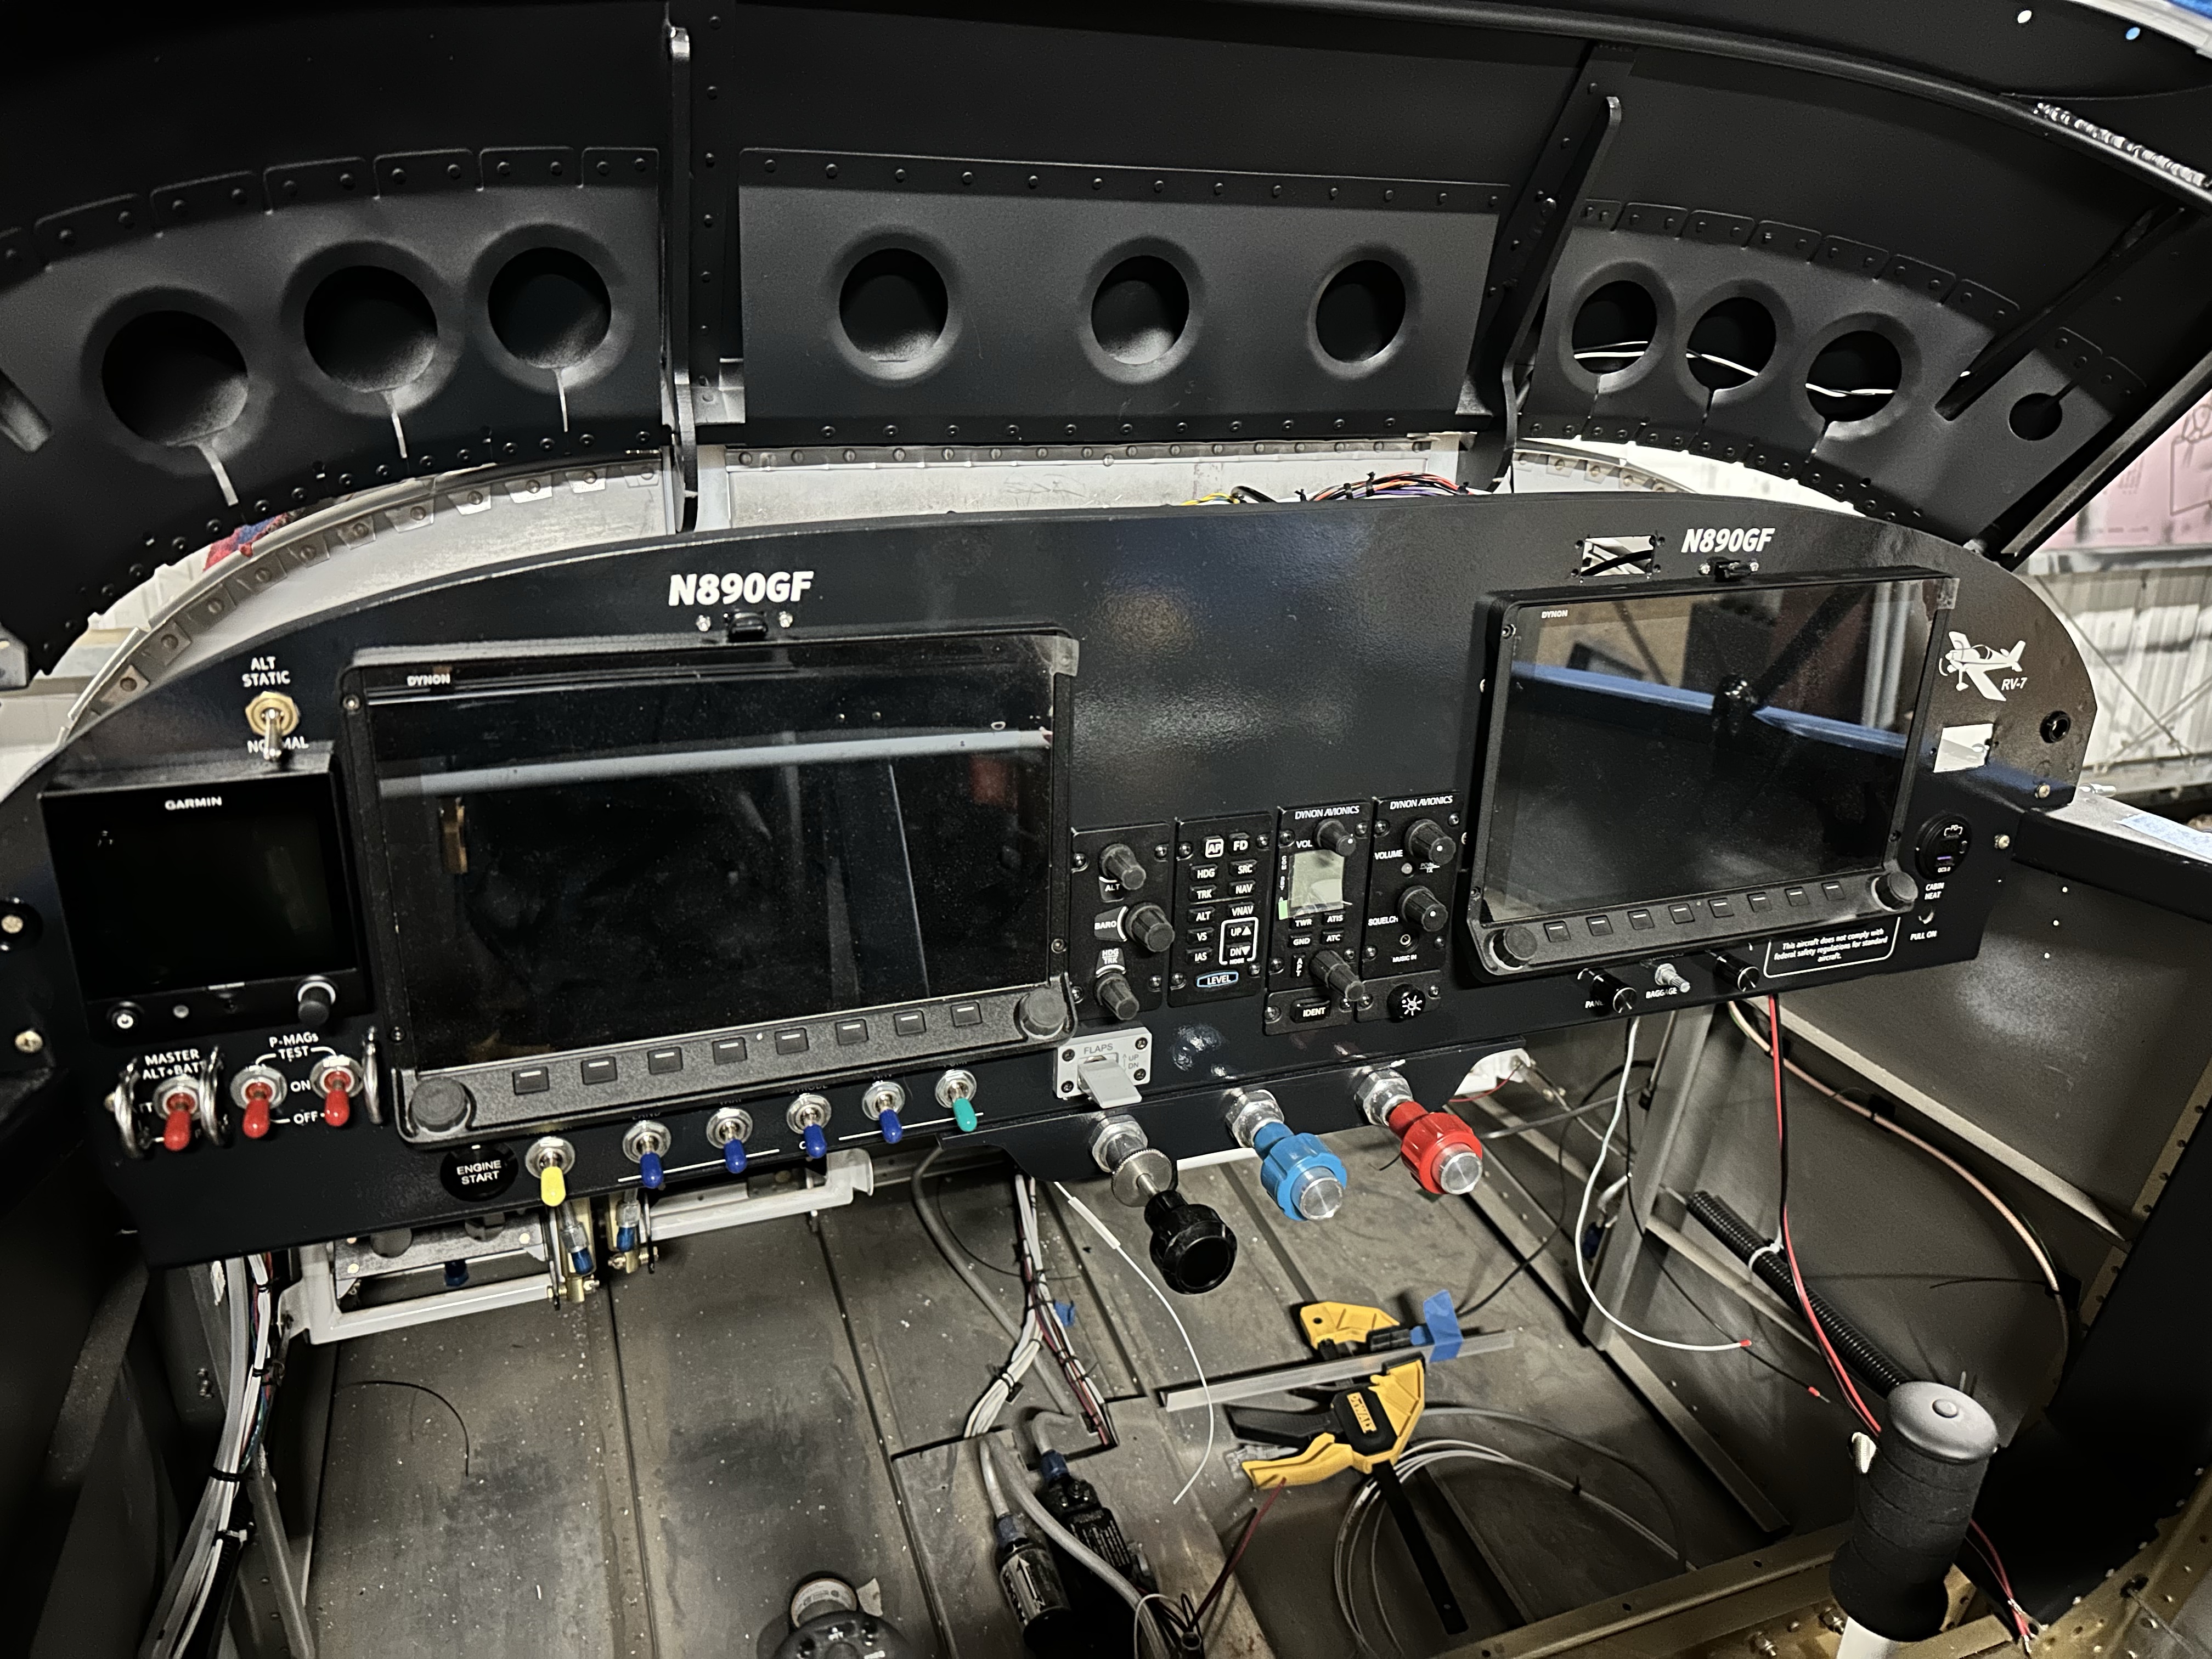
Here is everything installed on the panel (except the Hobbs and ELT indicator). I couldn’t pass up an opportunity to test everything.

Everything worked perfectly! It took me about an hour to fully install everything from start to finish. Not too bad all things considered. I have a couple things left to wire up including the avionics dimmer, and then CO monitor that is behind the panel.

Leave a comment