The last step in finishing the cowling installation is adding the SkyBolts to the split-line to join the top and bottom cowls.
I started out by marking the lower and upper cowl split-lines where they overlapped in order to make the top and bottom edges mate perfectly. Once Everything was marked, I used a long straight sanding block to sand back the edge of the lower cowl until it perfectly met the top cowl.
Next step was to add the flanges to the lower cowl. The goal here is to perfectly align the flanges with the top cowl flange at a 90º angle. I did this by first establishing how far down onto the lower cowl the flanges should sit, which was 1/2″ below the split line. I lined up one of the flanges with the top cowl flange and marked the lower edge of the flange.
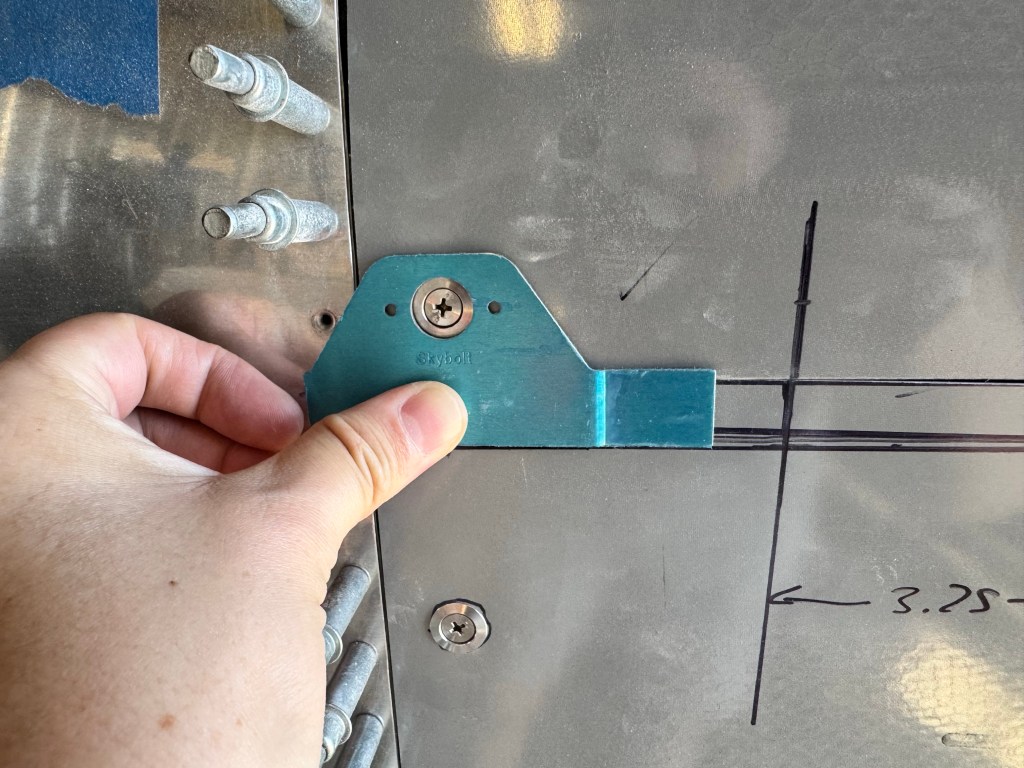
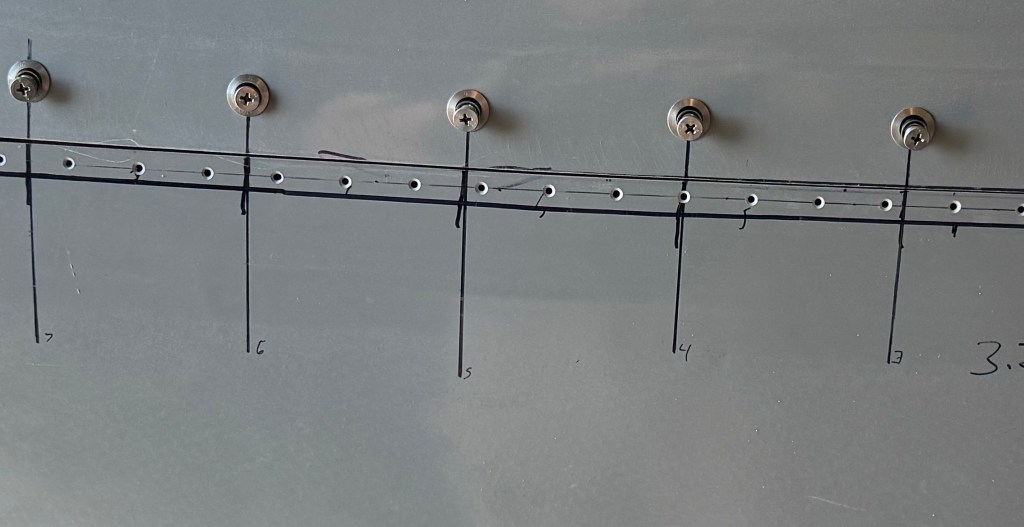
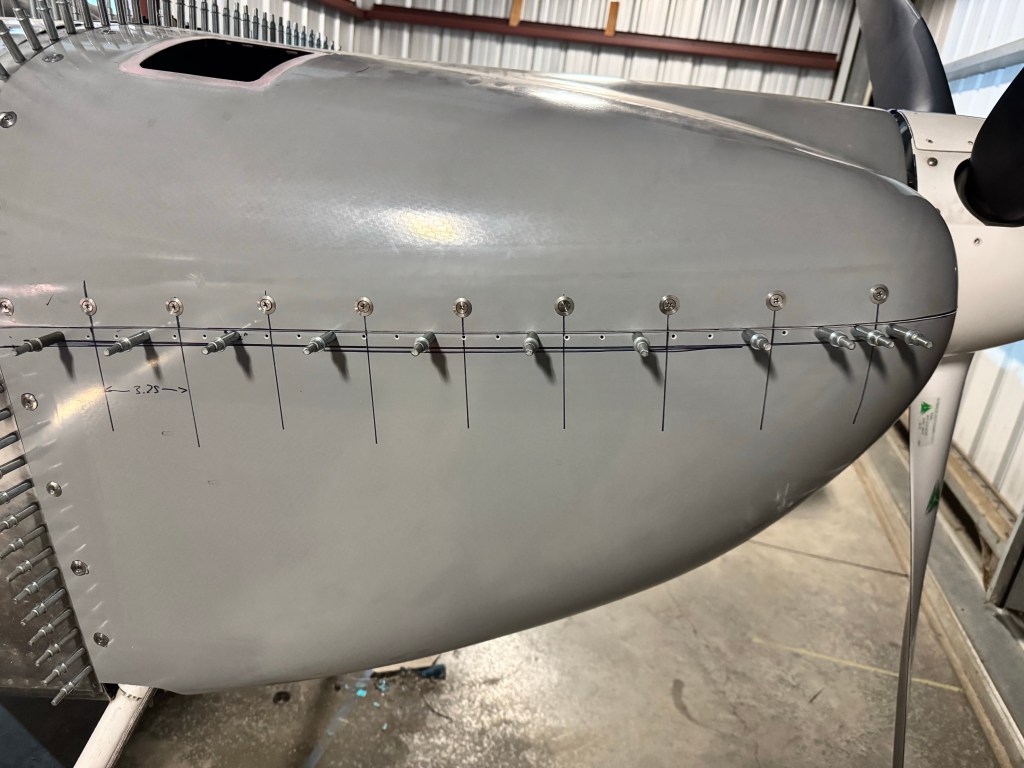
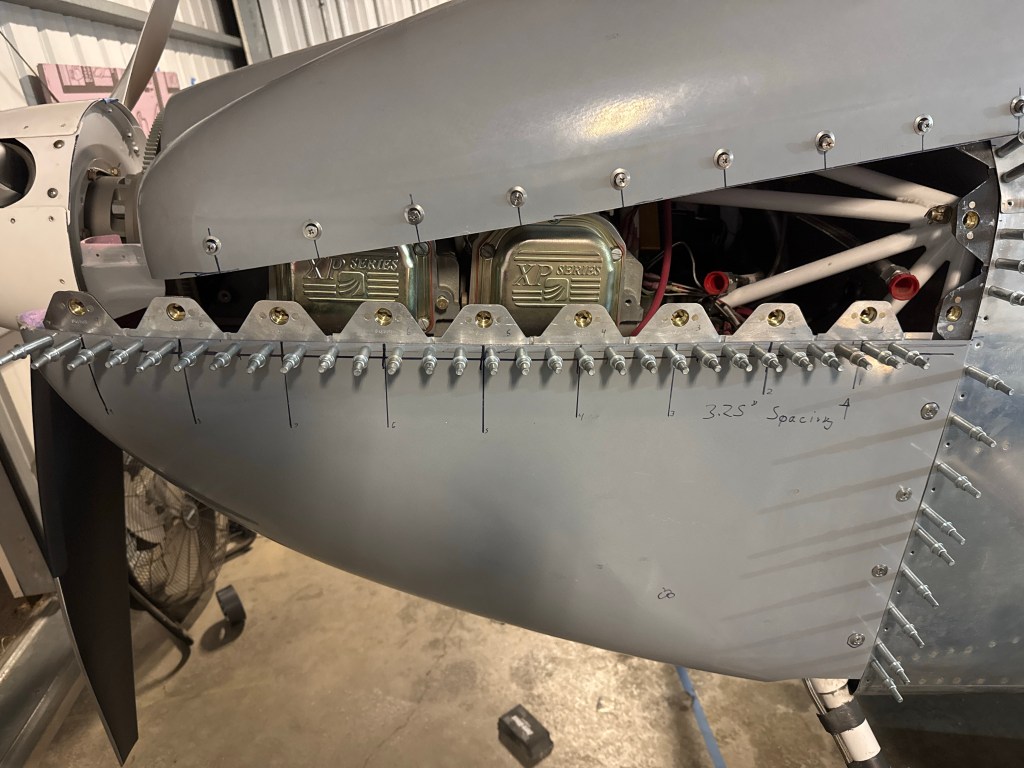
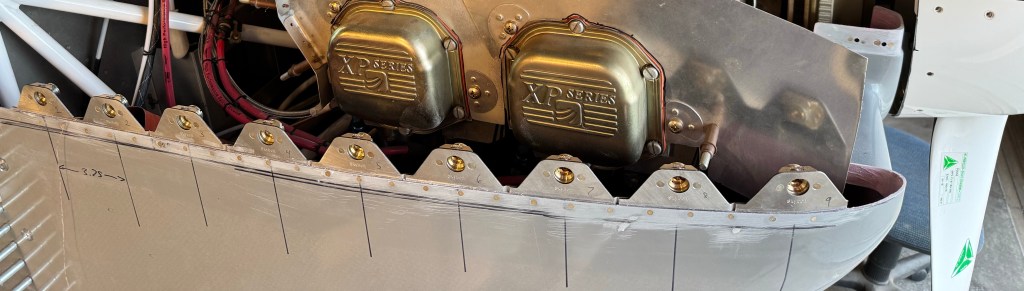
I then marked a 1/2″ line along the bottom cowl, and then established the appropriate spacing. I chose 3.25″ spacing between SkyBolts which would result in 10 (9 additional) SkyBolts across the split line.

Once everything was marked, I then drew vertical lines from the bottom cowl onto the top cowl at the 3.25″ spacing. I now had the lower flange limit and the vertical alignment, and was able to mark the location on the top cowl for where to drill a number 30 pilot hole for the SkyBolts.
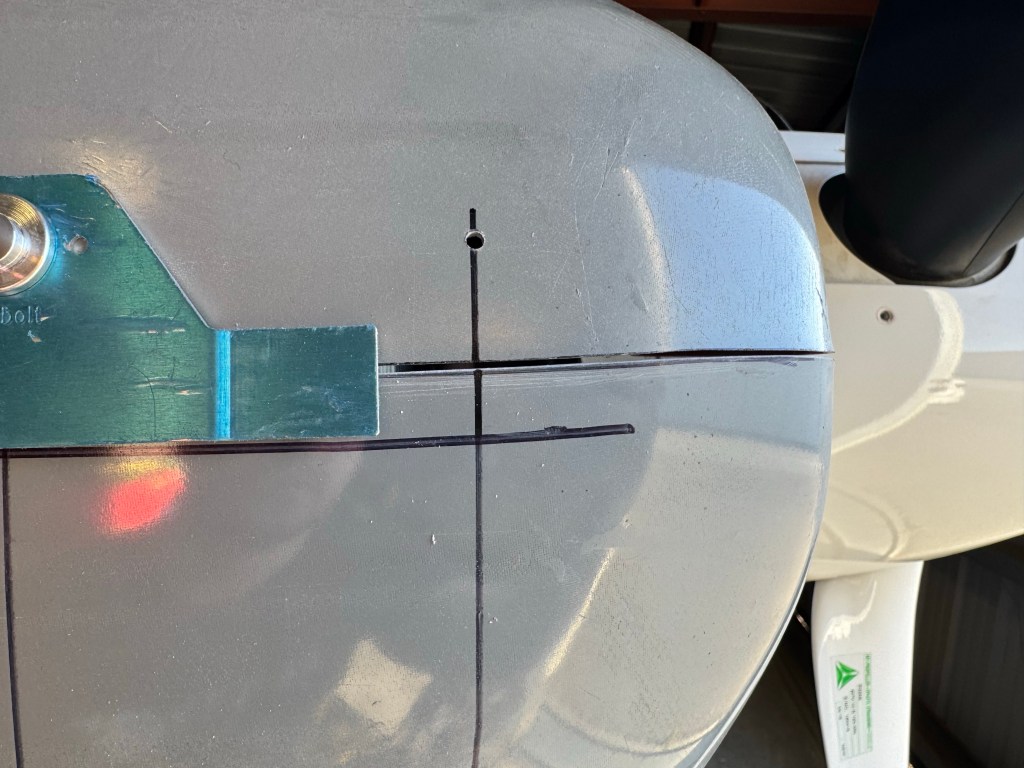
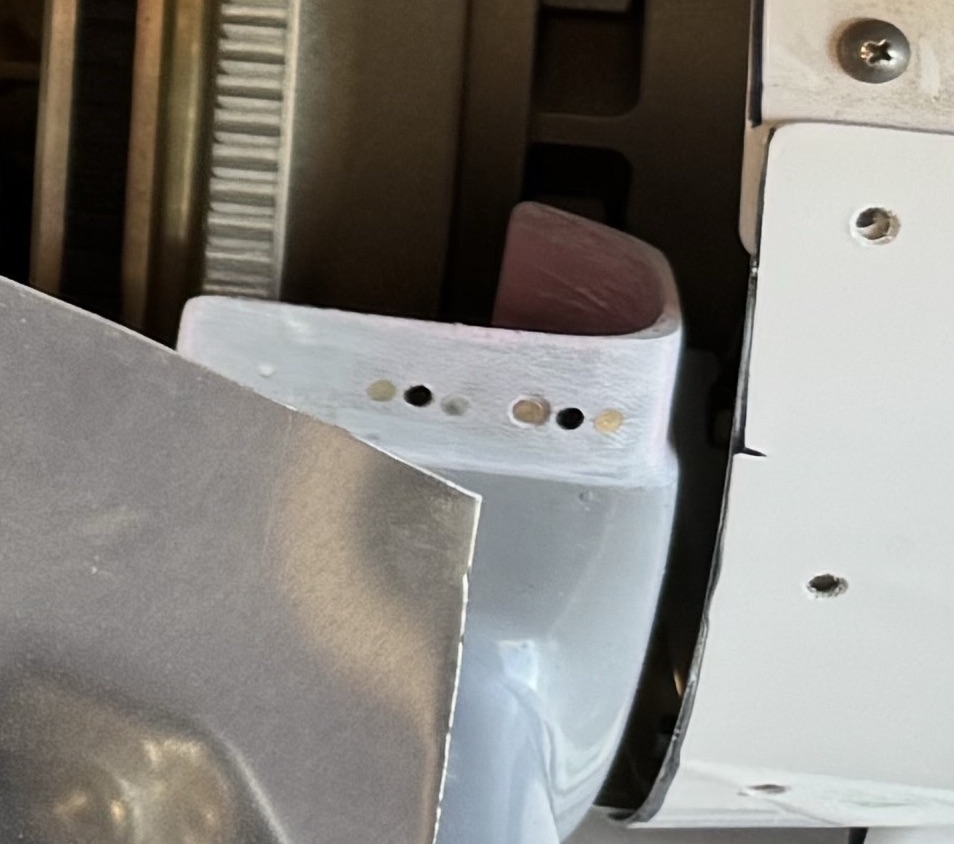
I marked the 9 additional holes, and then drilled them to number 30. This allowed me to cleco the flanges to the top cowl aligned with the bottom cowl along the split-line.
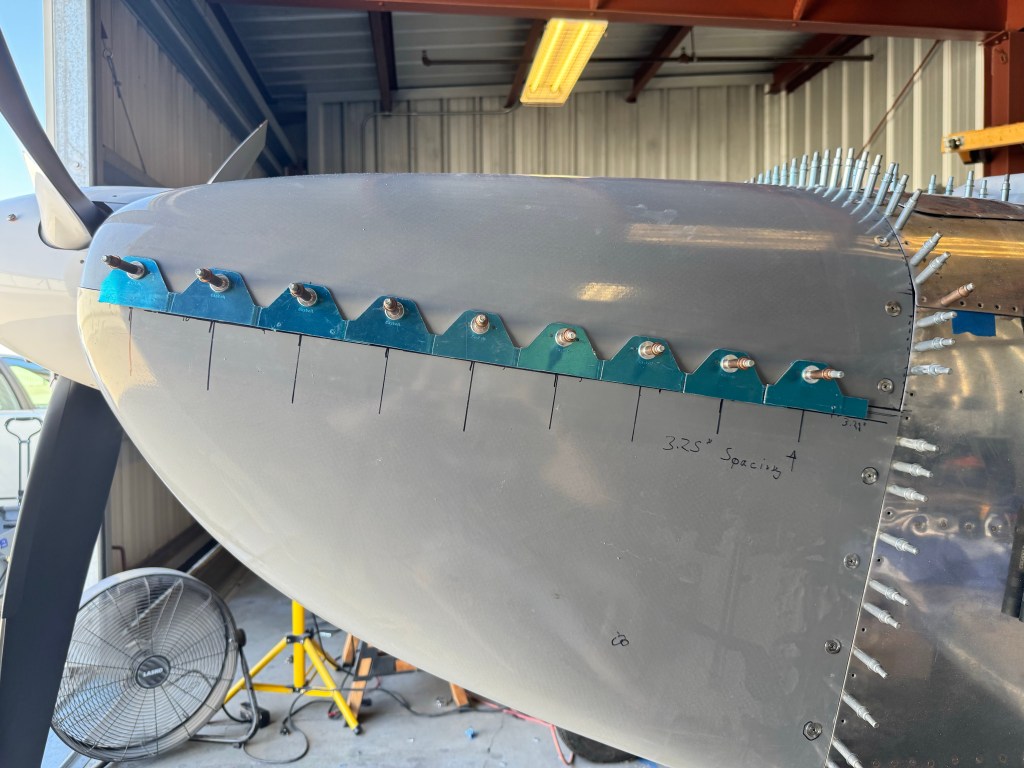
Once the flanges were all clecoed, I drilled all the holes to the lower cowl for the flange rivets. I then moved the flanges to the inside and drilled the top cowl skybolt pilot holes to the final size of 15/32″ and installed the grommets to the top cowl.
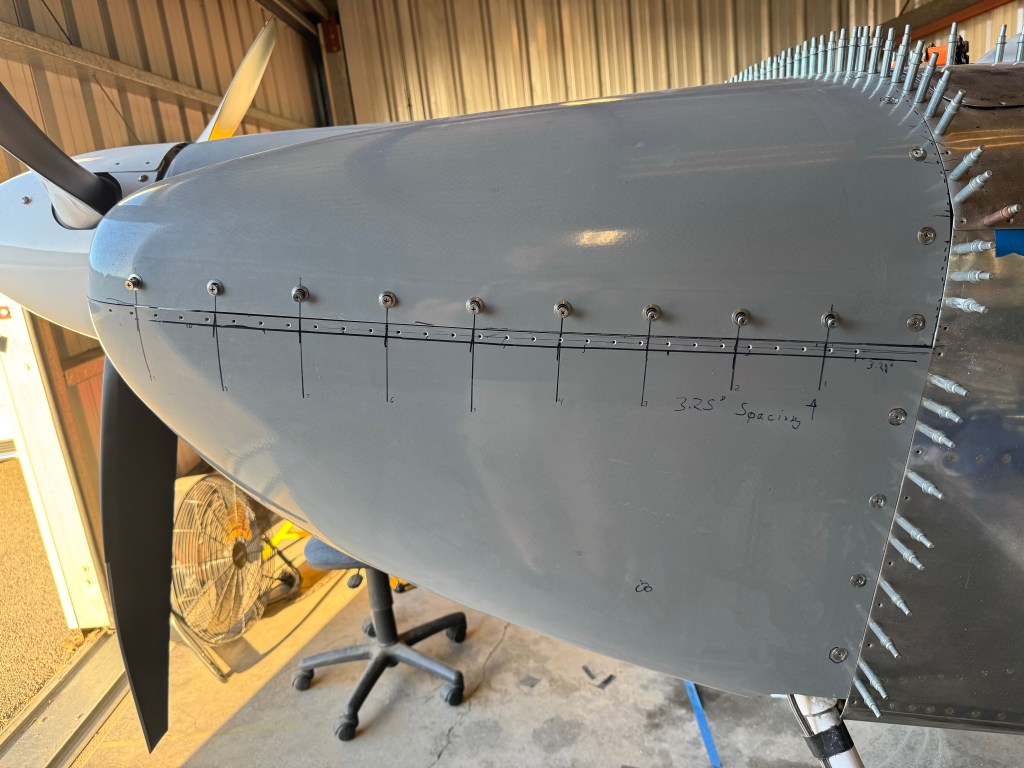

I also countersunk all the rivet holes on the bottom cowl. Then, I removed the top cowl and installed all the grommet retaining O-rings and installed the studs.

I then repeated this on both sides of the cowl and ensured everything is properly aligned.
After everything was fit and ready for permanent installation, I primed and prepped the flanges and installed the receptacles.

I then installed the flanges to the cowl with epoxy in prep for riveting.
I came back the next day, after the epoxy had cured and used the provided rivets from SkyBolt to rivet the flanges to the cowl.
The last step in finalizing the cowl installation is the forward inlet mounting screws. I drilled the holes with a number 10 bit for the -8 screws and marked the lower cowl for the nutplates rivet locations, countersunk the holes, and installed the nutplates. The cowl can now be screwed in at the forward inlets completing the installation

Leave a comment